Testing Instructions
The following pages will also help you become familiar with our testing software and answer any questions that you may have.
Instructions
1 of 13
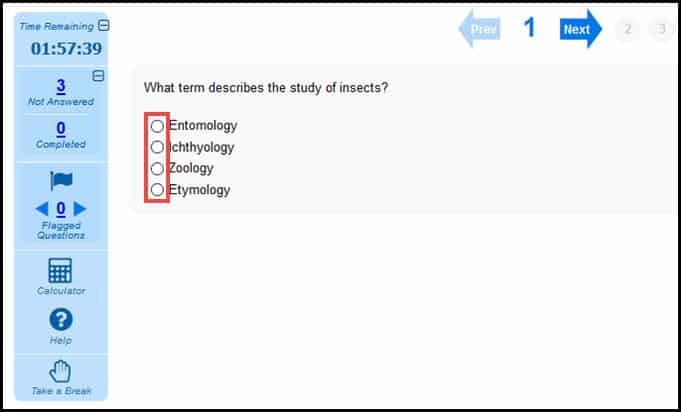
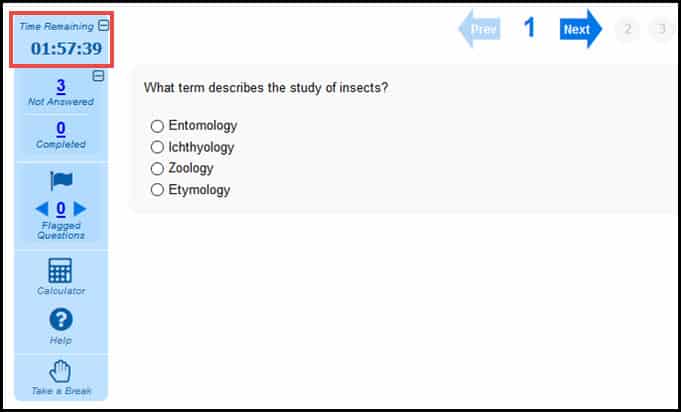
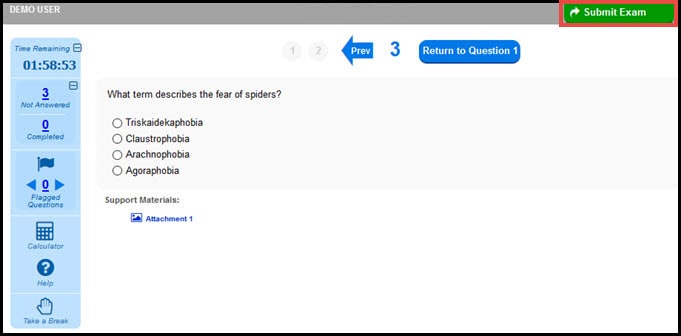
This image depicts the way your browser screen may appear when you are viewing the actual exam in the test display screen.
The exact layout of buttons may differ slightly on your screen because of variables such as your screen resolution, browser, or operating system, but functionality will remain unchanged. Note that some buttons may not appear at all due to the setup of your exam.

The circles highlighted on the image are used to select an answer. To choose a particular answer, click in the circle next to that answer. Selected answers will have a black dot in the center of their associated circles.
To change an answer, click in the circle associated with your new choice.
Some questions may ask you to select all of the correct answers that apply for a particular situation. For these questions, click in the square next to each desired answer. Selected answers will have a black check mark in the center of their associated square.
To change an answer, click on the check mark that you would like to remove and it will disappear from the square next to the associated answer choice.
In the middle of the test display screen are two labeled arrow buttons.
These buttons are used to move between the exam questions. Clicking one of these buttons displays a new question and saves the one you were previously viewing.
Click the left-pointing arrow labeled “Prev” to move to the previous question.
Click the right-pointing arrow labeled “Next” to move to the next question.
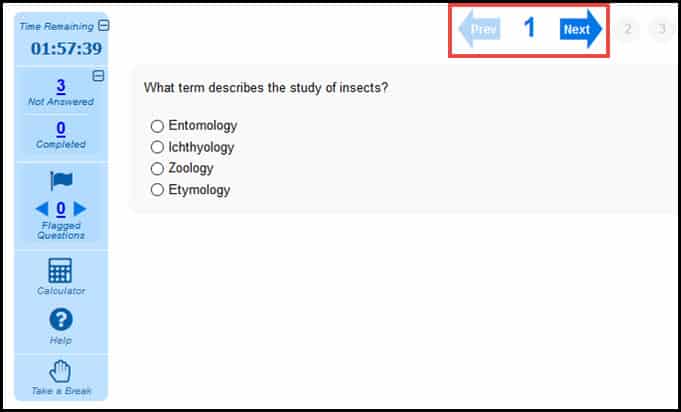
The numbers listed across the top allow you to jump to any exam question immediately.
Click on a number to navigate to that question.

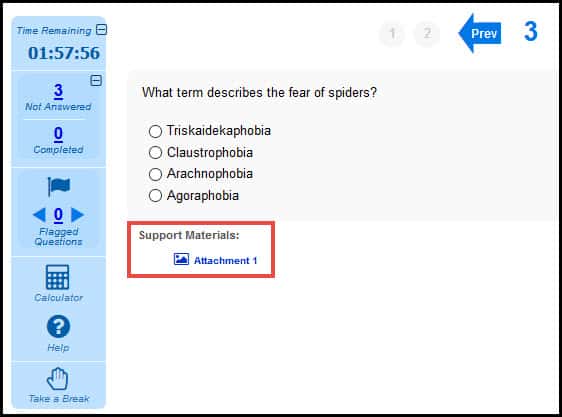
Some test questions may contain extra information needed to answer the question. These questions have attachments that will be displayed as hyperlinks on the test display screen under “Support Materials.” To open the attachment, click on the hyperlink. A new window containing the attachment will open.
If your exam is a time-restricted test, the time remaining will be displayed as highlighted below. When time expires, the test will be closed automatically by the system. If your exam is self-submitted due to the expiration of exam time, your exam will be scored based on the questions you answered prior to time expiration.
To hide the timer, click the minus icon located next to “Time Remaining.” To show the timer again, click the plus icon located next to “Time Remaining.” Note that the exam time will continue to expire even if the timer is hidden.
If the system detects inactivity for an extended period of time, it will ask you to confirm that you are still at the computer. If this occurs, click “Continue” to return to your exam.
On the left-hand side of the test display screen, below the timer, is the testing toolbar.
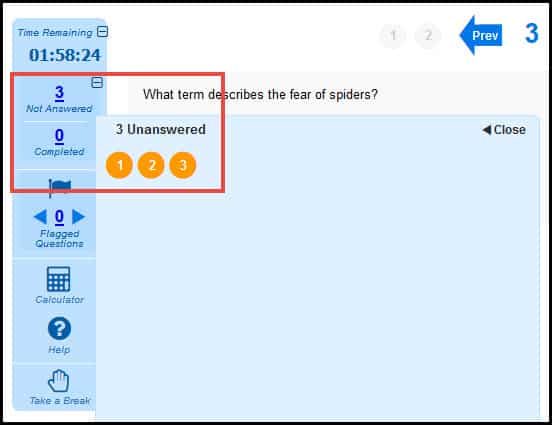
“Not Answered” notes the number of unanswered questions in the exam. This number updates as you answer questions.
“Completed” notes the number of answered questions in the exam. Again, this number updates as you answer questions.
Click on the underlined numbers to view a list of the identified questions. From the list that appears, click on a number to navigate directly to that question.
Occasionally, you may encounter a question that you would like to flag for future review. To mark an item, click the flag icon on the left-hand testing toolbar while viewing that question. The flag icon will turn red.
Flagging a question does not in any way affect your answer to that question, regardless of whether the question has been answered or not.
“Flagged Questions” notes the number of flagged questions in the exam. The number of flagged questions changes as you flag and unflag questions.
To navigate to previous or subsequent flagged questions, click the left or right arrow buttons. Alternatively, click on the underlined number to view a list of flagged questions.
To unflag a flagged question, click the flag icon while viewing the flagged question. The flag button will turn blue.

Some exams may allow the use of a calculator. If available, a Calculator button will appear on the testing toolbar. Click the “Calculator” button to open the on-screen calculator. To close the calculator, click “Close” in the upper right-hand corner of the calculator window or navigate to the next question.

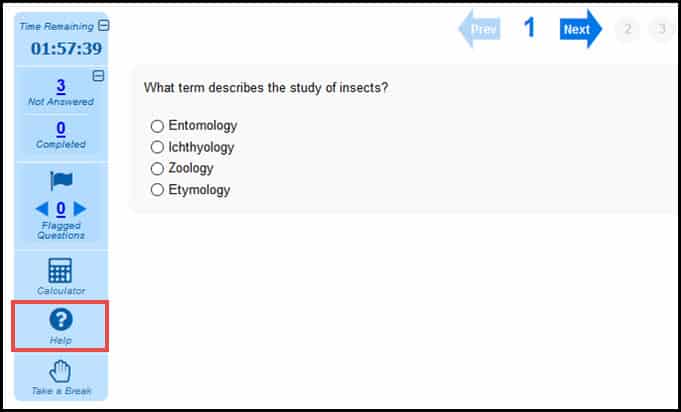
If you need help with this system during a test, click the “Help” button to return to this demonstration.
Please remember: If this is a time-restricted test, the time you spend reviewing help after you begin the exam will count against your allotted time for the exam.
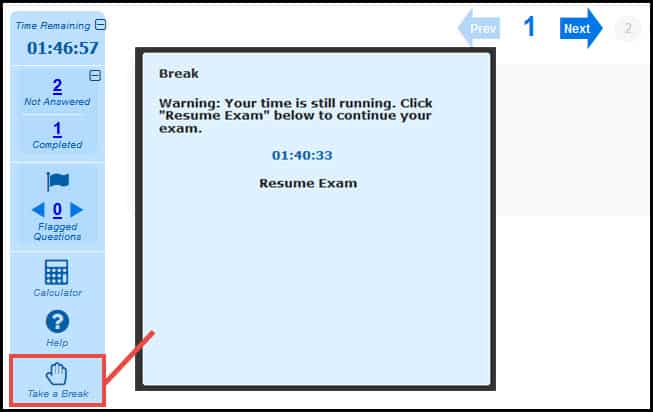
If at any point during the test you find that you need to step away from the computer, click “Take a Break.” Note that your exam timer will continue to count down while the “Take a Break” screen is shown. Click “Resume Exam” to continue testing.
Click the “Submit Exam” button when you have completed your exam and you are ready to have it scored.
If you are taking a time-restricted test and time expires, the test will be submitted automatically for scoring. Again, any exam submitted due to the expiration of time will be scored based on the questions you answered prior to time expiration.
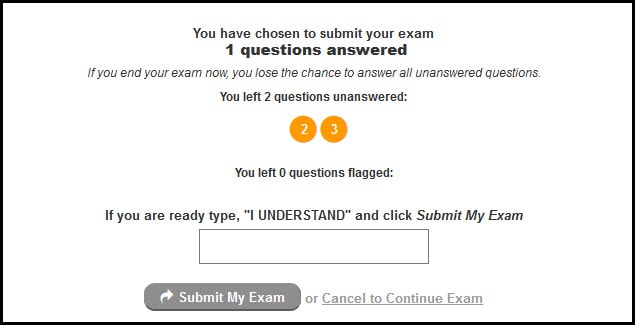
When you click the “Submit Exam” button, a confirmation page will ask you to verify your exam submission.
The confirmation page will indicate whether you still have unanswered questions. If you wish to go back to those questions and still have time left in the exam, click “Cancel to Continue Exam.”
If you are finished with your exam and ready to submit it for scoring, type “I understand” in the box provided and click “Submit My Exam.” This action cannot be undone.
This is the final demonstration window. You may now close help.